Sunday 30 November 2014

"A SNOWY FANTASY"

I knew that one day, somebody will order a "Frozen" Cake from me.  It is not a surprise that this movie has been a total phenomena.  Girls all over the world want a Frozen cake.  You can find lots of pictures in the internet but, I am an artist and I don't like to copy what somebody else did.  I like to create and let my imagination fly.

When somebody asks me to make a cake from a movie, I thing about all the characters from that particular movie.  In this case I decided to use "Olaf", a cute snowman character.  He is fun and cute and he loves snow, for that reason snow flakes seamed like a good idea.  Below you will see how I assembled the cake.  I hope you like my cake and this will inspire you to create amazing designs and remember to have fun in the process!


Assembling the cakes:


Vanilla Cake with Vanilla Filling colored in Frozen Blue (Bottom 10' cake)


Vanilla Cake with Vanilla Filling colored in Frozen Blue (Top 6' cake)


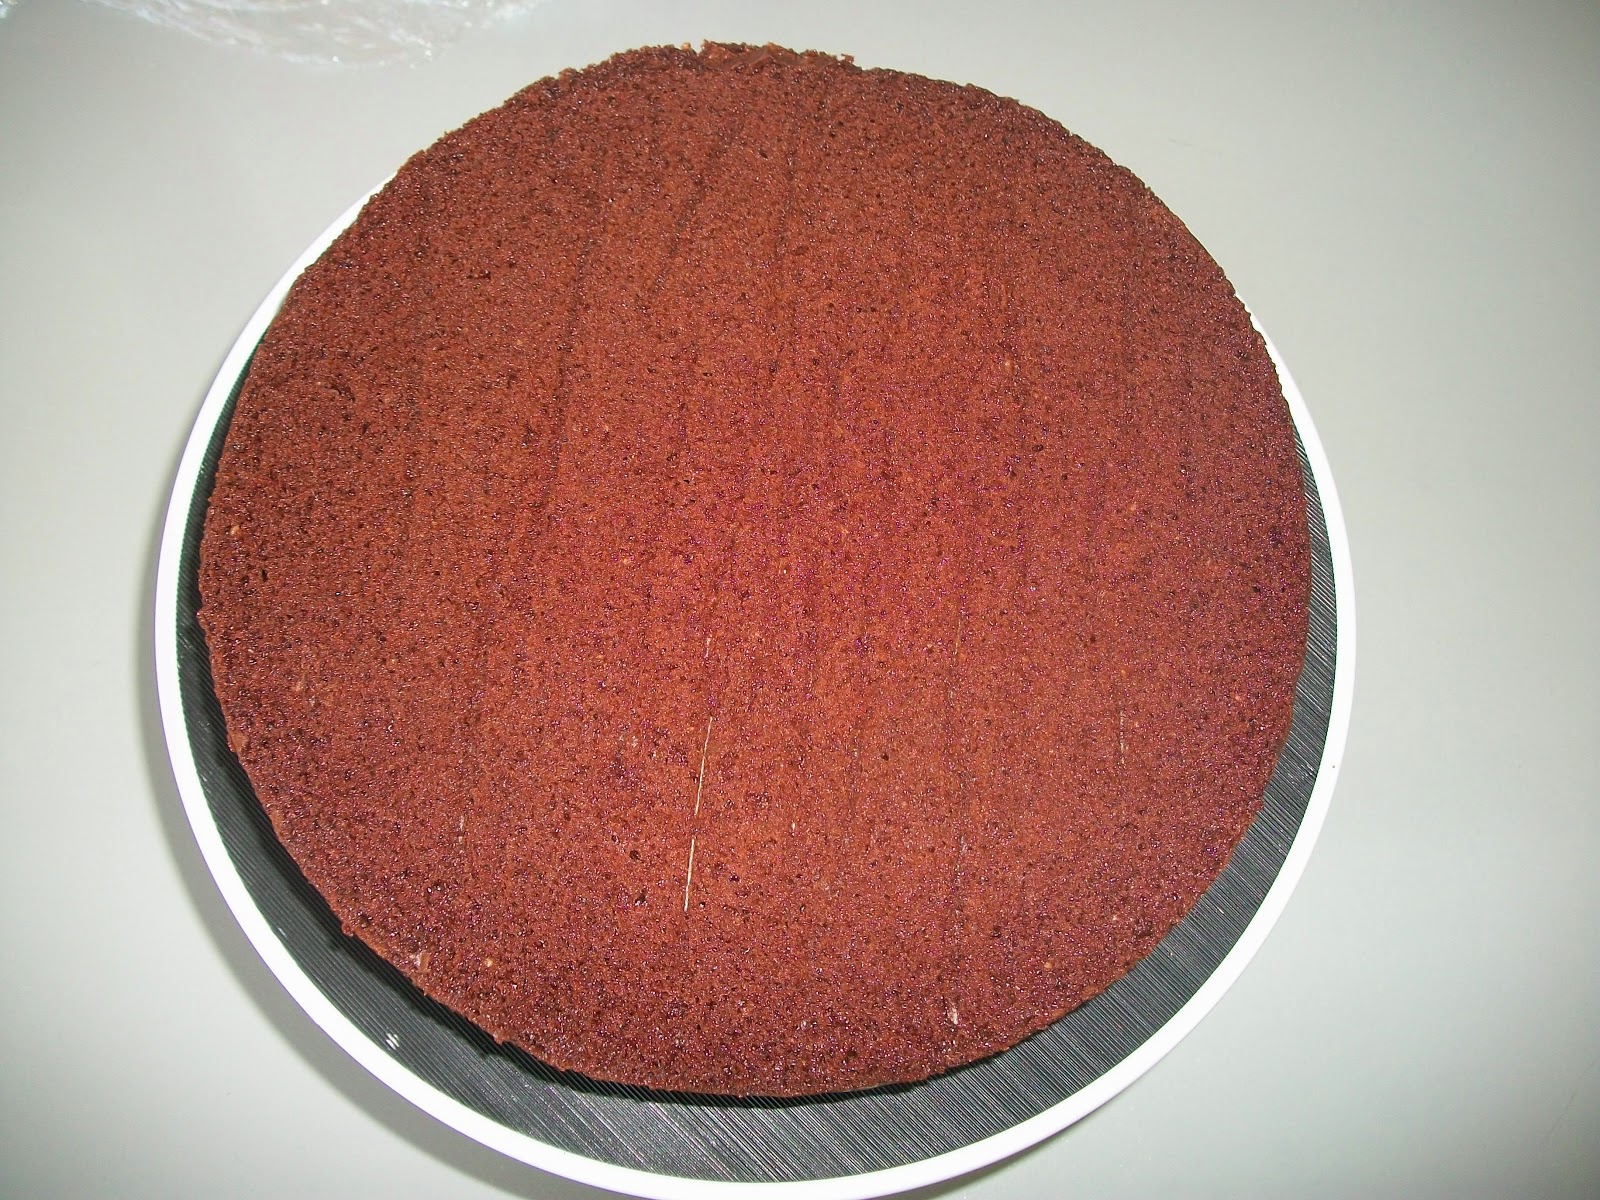
Chocolate Cake with Vanilla Filling colored in Frozen Blue (Middle 8' cake)


Icing the Cakes with Buttercream


Rolling out the Fondant


Covering the cakes with Fondant


Stacking the cakes:  
In order to stack the cakes, I used wood dowels to make sure that the cake will stay in one solid piece.

Decorating the cake:
Now comes the part where I let my imagination fly...


"Olaf" made from gum paste and fondant


Snow flakes made from from gum paste and fondant


Thank you and see you next time!


Friday 31 October 2014

Congratulations Liz Downes, you are the official winner of the "2nd Cake Decorating Contest 2014"


Thursday 2 October 2014

Are you up to the challenge?

We are having our "Second 2014 Cake Decorating Contest"


Challenge: "Halloween Cake Decorating Challenge"
Theme: "Halloween"
Date: Friday October 31st 2014
Only for my students, who are part of NATYCAKES, yummm! on Facebook or the Blog and live in Canada.

Rules and Conditions
  • You will have to decorate a cake, any shape.  Size between 8' and 10'.
  • At least one of the following should be used: butter-cream icing, royal icing, fondant or gum paste.
  • The theme is Halloween, be creative and show us something we haven't seen.
  • You should submit (3) pictures: one of you in the process of making your creation, another picture of the final product and the last picture with you holding your project.
  • Only one project per person.
  • Only NATYCAKES, yummm! members can participate (from Facebook or the Blog).
  • You have until Thursday October 30th to submit the pictures of your fantastic creation (9:00 am is the timeline).
The winner will be announced On Friday October 31st 2014. Check out the Blog that day and the winner will receive a special prize! 

E-mail address where to submit the pictures:

natybrocks@hotmail.com

Good luck and have fun in the process!


RED AND BLACK PARTY!

Summer was great! and now I am back with more tips and tricks on how to decorate cakes, cupcakes, etc...  Speaking about cupcakes, yesterday, I decorated (15) cupcakes for Sofia Sanchez who turned 19.  Congratulations Sofia and welcome to the club!

Sofia wanted me to make for her cupcakes that will look beautiful and festive.  She wanted me to incorporate black and a bright red color.  These are two challenging colors to make because, they take a lot of food coloring (color gel).  But I have some tricks that will help you get those colors.


For "BLACK":  I make the butter-cream recipe and I add cocoa (3/4 of a cup) plus (2) tablespoons of milk or water.  The butter-cream will turn brown and than I will add black color gel to the icing. Remember that the more color you add the stronger the icing will taste but, the cocoa will balance the flavour.


For "RED": Many people asked me before how I get a bright red.  The way I do it is by adding "Red No taste" and "Christmas Red", and we add lots of it.  I also added raspberry extract to balance the flavour.

The tips I used to do the decorations on top of the cupcakes were: 2A, 2D, 4B, 4M, 18 and 21.  I made some details with fondant to enhance the cupcakes.

The technique I used are the same we practice in "Wilton Course # 1" and also in the "Wilton Crazy for Cupcakes Project Class".  If you would like to learn how to do it, I invite you to join the course and experience how fun cake decorating can be.  :)

Thank you!

Natalia Brocks.

Monday 14 July 2014

"ROCK STAR PARTY"

Sometimes there are things that will inspire us to create a wonderful cake.  Anything can help us: shapes, colors, patterns, specific designs.  This cake is an example on how certain things inspire me to do this cake.  I hope you like this cake as much as I do.

Party plates, cups, napkins, etc... (for color and design ideas).


Also, the outfit for the party could be something that may inspire you to do something fun.


Bottom Cake: 10' Chocolate Cake with pink Vanilla Buttercream.


Second Cake: 8' Vanilla Cake with pink Vanilla Buttercream.


Using a solid cake board is important!


Gluing the cake to the board is also very important!


Stacking cakes...


Using wood dowels. 


Now, the fun part, decorating the cake...


The rock star doll! (made from gum paste)


The rock star wings! (made from gum paste)


The electric guitar!


Happy 6th Birthday Anabella!