Wednesday 4 November 2015

Halloween treats

It has been a long time since I posted something on my blog, I really apologize for that but, we had such a great summer this year here in Vancouver :)  

Halloween just passed and I had so much fun doing some decorations, I will like to share will all of you my treats...

The fist treat is made out off pumpkin pure, cheese cream and other delicious ingredients; covered in white chocolate these "Bloody eyes mummies pumpkin truffles" are just spooktacular!


Another treat that I made were the "Brain anilla cupcakes with lemon filing dyed green", and "Brani red velvet cupcakes with raspberry bloody filing", all of the covered in vanilla buttercream icing, they look terrific and are simply delicious!


My 3rd treat a customize Halloween cake.  A (2) tier vanilla cake with white vanilla buttercream icing in between layers. Every tier has 3 layers dyed in white, yellow and orange, like a candy corn, covered with white fondant and black fondant details.  A cake that tells a story, a spooky one!


I couldn't resist to make some "Halloween characters" by using cupcakes, buttercream icing and my imagination, so much fun!


"Cake Pops Halloween treats", using vanilla, chocolate, caramel and coconut flavour, are so much fun to make and my guests loved them!


I hope that you all had a great Halloween and that you all enjoyed my treats, please leave a comment below if you have any question.

Sunday 17 May 2015

ALOHA!

Our friend Brad D. is turning 50.  That is an important number and to celebrate this special occasion, he asked me to make him a:

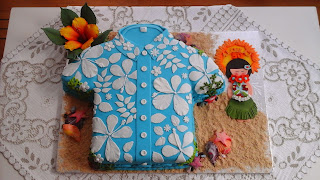
 "Hawaiian Shirt Cake"

There are hundreds of Hawaiian Shirt Cakes in the internet and you all know how I am, I wanted to do something fun, special and different.  I loved the idea of making a Hawaiian Shirt Cake and decided to incorporate some fun elements in my new project.

I wanted to do the shirt using the colors blue and white, which reminds me of the ocean.  Also I wanted to incorporate a cute "Hula Girl" and the iconic flower "The Hibiscus".  For that, I had to use the tools I have and be creative having of course lots of fun at the same time.  Also, I used many techniques that I teach in all my courses.  I hope you like my cake as much as I do.  Aloha and Happy 50th Birthday Brad!


First, I draw the shirt on a paper


Transferred the picture on a cardboard in order to do the cake board


Covered the cake board with aluminum foil


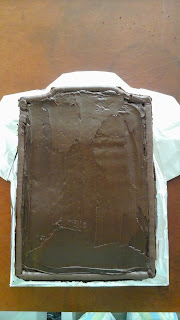
Proceeded to cut the shape of the shirt on the cake


First the body of the shirt


(3) layers of Chocolate cake with chocolate filling


Then, I proceeded to cut the sleeves and the rest of the shirt (same flavor for the cake and filling) 


Time to put everything together and finish icing the cake.


Covered the cake with fondant.  I used sky blue and teal to color it.


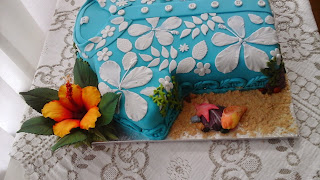
Used white fondant to make all the details on the shirt.


I finished the border making sure that it looks like the ocean and transfered the cake to a bigger cake board.


I made a cute "Hula Girl" banner made with fondant and gum paste in advance.


The "Hibiscus" was also made with fondant and gum paste.  A beautiful and colorful detail!


Used cookie crumbs for the sand and added some other elements like the chocolate rocks...


Happy 50th Birthday Brad!