Sunday, 17 May 2015

ALOHA!

Our friend Brad D. is turning 50.  That is an important number and to celebrate this special occasion, he asked me to make him a:

 "Hawaiian Shirt Cake"

There are hundreds of Hawaiian Shirt Cakes in the internet and you all know how I am, I wanted to do something fun, special and different.  I loved the idea of making a Hawaiian Shirt Cake and decided to incorporate some fun elements in my new project.

I wanted to do the shirt using the colors blue and white, which reminds me of the ocean.  Also I wanted to incorporate a cute "Hula Girl" and the iconic flower "The Hibiscus".  For that, I had to use the tools I have and be creative having of course lots of fun at the same time.  Also, I used many techniques that I teach in all my courses.  I hope you like my cake as much as I do.  Aloha and Happy 50th Birthday Brad!


First, I draw the shirt on a paper


Transferred the picture on a cardboard in order to do the cake board


Covered the cake board with aluminum foil


Proceeded to cut the shape of the shirt on the cake


First the body of the shirt


(3) layers of Chocolate cake with chocolate filling


Then, I proceeded to cut the sleeves and the rest of the shirt (same flavor for the cake and filling) 


Time to put everything together and finish icing the cake.


Covered the cake with fondant.  I used sky blue and teal to color it.


Used white fondant to make all the details on the shirt.


I finished the border making sure that it looks like the ocean and transfered the cake to a bigger cake board.


I made a cute "Hula Girl" banner made with fondant and gum paste in advance.


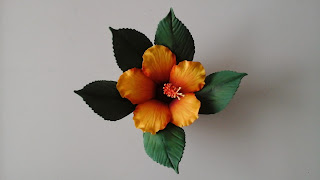
The "Hibiscus" was also made with fondant and gum paste.  A beautiful and colorful detail!


Used cookie crumbs for the sand and added some other elements like the chocolate rocks...


Happy 50th Birthday Brad!


Monday, 27 April 2015

MONSTER CAKES

Last Saturday, I did two Open Houses.  The first one at the Alberni Michaels store and the second one at the Michaels Broadway location.  I had so much fun while I was doing the demos, loved seen my students and friends and had the opportunity to tray the new Wilton products.

Every time I have an Open House/Demo, I like to be creative and have fun at the same time.  I always prepare myself to the occasion with something special that I will love to share with my dear students.  That way the can learn new techniques or at least get new ideas.

The idea was to decorate two cakes, one in each location.  So I decided to create a monster cake, a boy and a girl and because is Spring time, why not to create a love story between them.  I felt like a little girl playing with her toys :)

Now!, how to create a Monster cake.  I had some ideas in my head and decided to transfer those ideas on a piece of paper and hear is the result:


I had to create a monster cake: one male version and one female version.  At the Alberni location I used a  6' poppy seed lemon cake, that had coconut butter-cream filing and I covered it with blue lemon butter-cream icing.  I used tip # 1M and decided to do the star technique all around the side of the cake.  I knew that I won't have enough blue icing to finish the cake, so, I put white icing inside the same pastry bag I was using and did the top part of the cake.  Days in advance, I made the eyes, hands and toes by mixing gum paste and fondant. The dots and mouth were made from fondant.  Below you can see the final product:


I think he is adorable, what do you think? :) At the Broadway location, I used a  6' poppy seed lemon cake, that had coconut butter-cream filing and I covered it with pink lemon butter-cream icing.  I used tip # 1M and decided to do the rosette technique all around the side of the cake.  I knew that I won't have enough pink icing to finish the cake, so, I improvised by putting white icing inside the same pastry bag I was using and did the rest of the cake. I also made the eyes, hands and toes in advance by mixing gum paste and fondant. The dots and mouth were made from fondant.  Below you can see the final result: 


She is so cute and sexy too! (LOL).  You all saw how much fun I had and that is the idea to have fun.  I hope this will inspire you to make amazing cakes.  Share your pics, I will love to see your creations!

Have a fantastic week!

Natalia Brocks.
Wilton Certified Method Instructor